 V 3 1080p HDTS-C1NEM4")
 720p BluRay x264-GUACAMOLE")
 DUAL 1080p WEBRip x264 DD5 1-WOMBO")
 1080p AMZN WEBRip x264-GalaxyRG")
Size File: 11.53 GB?
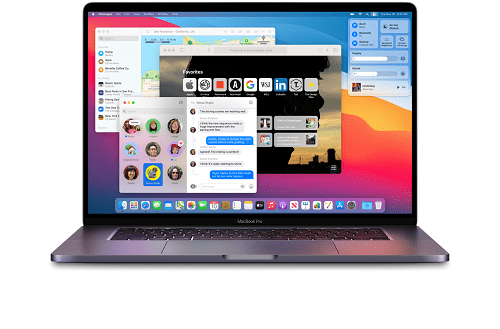
A VMware virtual machine with macOS installed. Before starting work with the machine, be sure to apply VMware Unlocker as administrator . The required screen resolution should be set automatically in accordance with the settings of the computer on which the virtual machine is running. Choose the rest of the parameters (the number of CPU cores, memory, etc.) according to your hardware.
Before starting, we check the compatibility of the equipment with this program.
ADMINISTRATOR PASSWORD: 1234
To start the machine, the processor must support virtualization and DEP
If virtualization and DEP are disabled, enable them via BIOS
To reduce the brakes, it is recommended to run in VMware Player
Attention! Use VMware Workstation, not VMware Player for correct and complete machine setup
Attention! This image is designed to work with the current version of VMware Workstation
Attention! Applications for OS X that require 3D acceleration (OpenGL) cannot be run due to the lack of required drivers
The only video player that plays video on this build is Movist, the rest have only sound without images
The ? (Command) key is the default key (Windows)
Switch keyboard layout configured for CTRL + Space
If errors occur, read the information under the spoiler "Errors that occur when running OS X in VMware Workstation"
Installation method
1. Install VMware Workstation or VMware Player. Unpack the macOS Big Sur.7z archive
2. Apply the patch from the VMware Unlocker archive on behalf of the administrator (see the Tablet line in the topic header)
3. Open the macOS Big Sur.vmx file via File-> Open
4. Configure the virtual machine for your hardware.
5. Launch
Errors when running OS X in VMware Workstation
1. If this error occurs:
Mac OS X is not supported with binary translation. To run Mac OS X you need a host on which VMware Workstation supports Intel VT-x or AMD-V.
This means that virtualization is disabled in the BIOS or the processor does not support it. Or, if the hardware compatibility check is successful and virtualization is enabled, but the error still occurs, try copying and replacing the following lines into the * Name * .vmx file:
Code:
monitor.virtual_mmu = "software"
monitor.virtual_exec = "hardware"
1.1 If this error occurs:
The CPU has been disabled by the guest operating system. Power off or reset the virtual machine.
This means that virtualization is disabled in the BIOS or the processor does not support it.2. If after the initial splash screen (or if it hangs on it for a long time), a black screen with stripes appears, then you need to apply Unlocker again3. If this error occurs:
VMware Player unrecoverable error: (vcpu-0)
vcpu-0:VERIFY vmcore/vmm/main/physMem_monitor.c:1123
A log file is available in "D:\\VMWare\\MacOS\\vmware.log".
You can request support.
To collect data to submit to VMware technical support, run "vm-support".
We will respond on the basis of your support entitlement.
So you need to write the line smc.version = "0" in the configuration file * Name * .vmx (run notepad from the admin).4. If this error occurs:
The configuration file "G:\\virtual\\OS X Yosemite\\OS X Yosemite\\OS X Yosemite.vmx"
was created by a VMware product that is incompatible with this version of VMware Workstation and cannot be used.
This means you need to rollback the hardware configuration to the desired version. We do the following:
1. Launch VMware Workstation (NOT VMware Player).
2. Go to the "VM" (Virtual Machine) menu.
3. We are looking for the item "Manage" (Management).
4. Next, select "Change Hardware Compatibility".
5. In the dialog box that opens, select the desired version of VMware Workstation from the Hardware Compatibility list and click Next.
6. You will be prompted to apply the changes to the cloned copy of the machine, or change the configuration without creating a copy.
7. Select the appropriate option and click "Next", then "Finish"
8. Done5. If an error like Kernel Panic occurs
(CPU 0 caller... Thread 0 crased...)
So you need to do the following (the author of the kup2013 method ):
1. Open the Machine Settings - General
2. Specify the OS X Version - 10.76. If this error occurs:
Attempting to start up from:
EFI VMware Virtual SATA Hard Drive (0.0) ... unsuccessful
EFI VMware Virtual SATA CDROM Drive (1.0) ... unsuccessful
This means that the Execute Disable Bit must be enabled in the BIOS. Please note - in different BIOS versions, this option may be called differently:
Execute Disable Function
Intel XD Bit
No-Execute Memory Protect
NX BIOS Control
NX Technology
XD Technology
There is also a video about this problem.
YouTube: wfe8bw973X87. If this error occurs:
Not enough physical memory is available to power on this virtual machine with its configured settings.
To fix this problem, decrease the memory size of this virtual machine to 3556 MB, or adjust the additional memory settings to allow more virtual machine memory to be swapped.
If you were able to power on this virtual machine on this host computer in the past, try rebooting the host computer. Rebooting may allow you to use slightly more host memory to run virtual machines.
This means you have allocated too much RAM for the machine to run.8. If this error occurs:
Failed to lock the file
Cannot open the disk '???? ?? ????? .vmdk' or one of the snapshot disks it depends on.
Module 'Disk' power on failed.
Failed to start the virtual machine.
So you need to delete .lck files from the folder with the machine9. If there are any problems with connecting USB peripherals, including iOS devices, switch compatibility in the virtual machine settings, in the USB controller section, to USB 2.0 compatibility. In this case, it is necessary to have the following parameters in the * Name * .vmx file
usb_xhci.present = "FALSE"
and
usb:1.speed = "2"
Updating iOS to the current version should also help.9.1 If, when connecting USB devices to the machine, an error occurs:
The connection for the USB device "
You need to safely disconnect the device from the host, wait 10-15 seconds and try to connect to the machine10. If the mouse, keyboard, or internet does not work, try changing the line
guestOS = "darwin16-64"
on
guestOS = "darwin15-64"
Installed programs
VMware Tools - accesses shared folders, shared clipboard, and more
A way to create a bootable ISO file for a clean install of any macOS version on VMware and VirtualBox
First you need to copy Install macOS Big Sur.app to the Applications folder. Further commands are executed in the Terminal, sequentially:
Code:
# Create a macOS Big Sur Virtual Disk Image
hdiutil create -o /tmp/bigsur -size 16384m -volname bigsur -layout SPUD -fs HFS+J
# Mount this Image to macOS
hdiutil attach /tmp/bigsur.dmg -noverify -mountpoint /Volumes/bigsur
# Use macOS Big Sur Createinstallmedia Tool to create a Installer Image
sudo /Applications/Install\\ macOS\\ Big\\ Sur.app/Contents/Resources/createinstallmedia --volume /Volumes/bigsur --nointeraction
# Unmount Volume Install macOS Beta
hdiutil eject -force /Volumes/Install\\ macOS\\ Big\\ Sur
# Convert the bigsur.dmg to a bigsur.iso for Virtual Machine
hdiutil convert /tmp/bigsur.dmg -format UDTO -o ~/Desktop/bigsur.cdr
# Move and Rename bigsur Image to Desktop
mv ~/Desktop/bigsur.cdr ~/Desktop/bigsur.iso
How to reduce the size of a virtual disk
It is recommended to run the command in the terminal before starting the process:
sudo pmset hibernatemode 0; sudo rm -f /var/vm/sleepimage
1. In the guest virtual machine, launch Terminal and enter the following command:
sudo diskutil secureErase freespace 0 macOS
where macOS is the name of the OS partition
2. Turn off the virtual machine. We do not pause, but turn it off.
3. In Windows, start the command line and enter:
"C:\\Program Files (x86)\\VMware\\VMware Workstation\\vmware-vdiskmanager.exe" -k "E:\\[Virtual Machines]\\macOS Big Sur\\macOS Big Sur.vmdk"
where C: \\ Program Files (x86) \\ VMware \\ VMware Workstation is the directory where VMware Workstation is installed,
E: \\ [Virtual Machines] \\ macOS Big Sur \\ macOS Big Sur.vmdk - path to the virtual machine file.Alternative compression method. By TieLay .
In the terminal, execute the following commands in sequence:
sudo pmset hibernatemode 0
sudo rm -f /var/vm/sleepimage
sudo cat /dev/zero > wipefile
sudo rm wipefile
Next, turn off the car regularly. We follow step 3 of the instructions above.
An alternative way to change the screen resolution
In the terminal, execute the commands:
Code:
sudo /Library/Application\\ Support/VMware\\ Tools/vmware-resolutionSet 1920 1080
sudo defaults delete /Library/Preferences/com.apple.windowserver.plist DisplayResolutionEnabled
(example for Full HD resolution)
System requirements :
1. Intel or AMD processor with hardware virtualization support
2. From 1 GB of RAM (2 GB or more recommended)
3. WinRar program, 7-Zip or analog
4. VMware Workstation or VMware Player program of the current version (for AMD not lower than 16.1)
Year of release : 2020
Version : 11.3 (20E232)
Developer : Apple Inc.
Developer site : © Apple Inc.
Platform : Intel or AMD processors
Interface language : multilingual
Tablet : VMware Unlocker (you need to download the unlocker.zip file)
https://github.com/paolo-projects/unlocker/releases/tag/3.0.3
HOMEPAGE
https://www.apple.com/
https://rapidgator.net/file/e213957ad5f2cc3e8fbd9bb8dbd80688/macOS_Big_Sur_11.3.part01.rar.html
https://rapidgator.net/file/ae3126983d823222519437735782950c/macOS_Big_Sur_11.3.part02.rar.html
https://rapidgator.net/file/d3a5a09740a7e901bc5662a65fb7a00e/macOS_Big_Sur_11.3.part03.rar.html
https://rapidgator.net/file/16ec8e1accf614317748965afc8cbb28/macOS_Big_Sur_11.3.part04.rar.html
https://rapidgator.net/file/ff5f6936f18165299fb0fc824abc0b4f/macOS_Big_Sur_11.3.part05.rar.html
https://rapidgator.net/file/676d9295090aa9b3a5e2443ce6e803d2/macOS_Big_Sur_11.3.part06.rar.html
https://rapidgator.net/file/903afeb12e6e0f6486d0114ef8f9ac80/macOS_Big_Sur_11.3.part07.rar.html
https://rapidgator.net/file/08948000d9069511f8ec78633d84fc56/macOS_Big_Sur_11.3.part08.rar.html
https://rapidgator.net/file/57a4f2292a104b3f5e91ea3fb3bd0e43/macOS_Big_Sur_11.3.part09.rar.html
https://rapidgator.net/file/24ad74f54092330e94758db26c6ab25c/macOS_Big_Sur_11.3.part10.rar.html
https://rapidgator.net/file/446ab78b216291d075ac7e4713794717/macOS_Big_Sur_11.3.part11.rar.html
https://rapidgator.net/file/e249874ee2d9650d40c0816ff1db0fd4/macOS_Big_Sur_11.3.part12.rar.html
Feel free to post your MacOSX Big Sur 11.3 (20E232) (For VMWare) Free Download, torrent, subtitles, free download, quality, NFO, Dangerous MacOSX Big Sur 11.3 (20E232) (For VMWare) Torrent Download, free premium downloads movie, game, mp3 download, crack, serial, keygen.